We understand CFM and PSI measure different, but complementary, capabilities in an air compressor. CFM tells us the usable airflow at a given pressure, while PSI signals the pressure reserve for bursts and responsiveness. Together, they define practical performance, not just numbers. If we compare tool demands to supply, we can size for duty cycles, avoid waste, and plan storage and maintenance. There’s more to balance and it’s where steady, reliable performance truly starts.
Key Takeaways
- CFM measures the air volume a compressor can sustain, indicating usable airflow at working pressure.
- PSI indicates the pressure available at the tool’s inlet, shaping torque, speed, and responsiveness.
- Use CFM and PSI together: match tool air demands (CFM) with supply pressure (PSI) for reliable performance.
- Read specs as constraints: higher CFM means more air; higher PSI means stronger peak performance.
- For planning, calculate total CFM at target PSI across all tools and ensure the compressor and tank meet that combined demand.
H2 #1 What CFM and PSI Really Mean for Air Tools
What do CFM and PSI really mean for your air tools? We frame these metrics with precision, rigor, and practicality, guiding you through what matters for performance. CFM measures how much air your tool needs to operate, reflecting sustained flow at a working pressure. PSI indicates the pressure available at the tool’s inlet, shaping torque, speed, and responsiveness. Together, they define capability, not mere numbers. We assess your tasks, not trends, to determine if your compressor delivers consistent airflow or just momentary bursts. In our sales pitch, we emphasize efficiency, reliability, and serviceability, while balancing aesthetic design with functional clarity. We teach you to value real-world intake, avoid hidden compromises, and select gear that aligns with your workflow.
H2 #2 How to Read CFM and PSI on a Specs Chart
So, how do you read CFM and PSI on a specs chart without getting lost in the numbers? We’ll parse values by intent: CFM is flow at a given PSI, while PSI is pressure at flow. Read the chart as constraints: match tool demand (CFM) with available air supply (PSI). Ignore irrelevant topic entries and avoid unused concept noise.
| Column A | Column B |
|---|---|
| CFM reference | PSI reference |
| Higher CFM means more air flow | Higher PSI means stronger pressure |
| Note the test condition | Note the rated condition |
| Use the pairing that meets tool needs | Ensure supply meets or exceeds the pairing |
| Validate with real usage | Confirm with practical testing |
H2 #3 Matching CFM to Tool Demands: Nailing and Sanding
When nailing and sanding, matching CFM to tool demands isn’t optional—it’s essential for consistent results and tool longevity. We approach this with precision: announce the needed airflow first, then confirm the tool’s CFM draw under typical load. Nailing hammers demand steady bursts; sanding machines require sustained flow to prevent stall and heat build-up. If CFM is too low, performance dips, and you’ll see uneven finishes or stalled tools. If too high, you waste energy and generate unnecessary noise—though effective noise reduction strategies can offset some of that burden. Consider alternative energy considerations when selecting a compressor, ensuring the unit can sustain peak CFM without cycling excessively. In practice, tailor CFM to the combined demands of both tools for reliable, repeatable results.
H2 #4 Matching PSI to Applications: Spraying and Fasteners
Spray finishing and fastening with air require precise PSI control to achieve consistent results and protect both the finish and the fastener drive. We assess PSI by application: spraying demands steady, low-to-mid pressure with stable flow to prevent drips and overspray, while fasteners benefit from brief, controlled bursts to avoid thread damage. We prioritize matching PSI to tool demands, not just overall power, to maximize airflow efficiency and minimize waste. For spraying, use the smallest effective pressure that maintains atomization quality; for fastening, balance enough PSI for reliable drive without overdriving. We also consider noise reduction by selecting regulators and nozzles that preserve performance while limiting pressure fluctuations. This disciplined approach yields reliable finishes and durable assemblies.
H2 #5 How to Calculate Needed Air Volume for Your Shop
We’ll walk you through calculating the air volume your shop needs, focusing on the key metrics that drive demand. We’ll compare CFM versus PSI impacts and show how to translate shop air demand into practical numbers. By the end, you’ll have a concise framework for sizing your compressor and validating expected performance.
Calculating Required Air Volume
Estimating the air volume your shop needs starts with understanding your tools’ demands and how they’ll run together. We map peak CFM and simultaneous usage, then size a system that sustains pressure without cycling excessively. Start by listing tools, their duty cycles, and recommended CFM at operating pressure. Add a safety margin for peak bursts and future additions. Next, convert all demands to a common baseline and check whether your compressor’s output can meet the combined need without starving any tool. Remember, storage capacity matters: a tank that’s too small forces the compressor to start more often, reducing efficiency. We avoid vague targets; instead, we quantify demand, then verify against real-world duty cycles, acknowledging an unrelated topic as a contextual aside and a random comparison to basic shop workflows.
Shop Air Demand Metrics
Do we have a reliable method to quantify shop air needs? We approach shop air demand with precision, building metrics from real use. We start by listing end-user tools and their duty cycles, then we translate each requirement into cubic feet per minute, or CFM, at the point of use. Next, we aggregate each device’s peak and average demands, apply diversity factors, and verify with guardrails for startup surges. We validate assumptions through randomized testing across typical workloads, ensuring our numbers aren’t based on theory alone. Finally, we translate our findings into actionable metrics that support clear marketing angles: what customers gain in uptime, reliability, and cost-per-hour. This method balances rigor with practicality, delivering repeatable, defendable shop air demand results.
CFM vs PSI Impacts
How do CFM and PSI interact when sizing a shop air system, and why does that relationship matter for performance? We balance flow (CFM) and pressure (PSI) to meet tool demands without waste. Higher CFM at a fixed PSI improves simultaneous tool performance, while higher PSI alone won’t compensate for insufficient volume. Practical sizing prioritizes real demand, avoiding irrelevant topic and extraneous detail that inflate system cost. We measure peak CFM needs, then select a compressor and storage that sustain those rates at usable pressures. System losses from hoses and fittings must be accounted for, or performance drops appear under load. Accurate planning reduces compressor cycling, heat, and maintenance.
- Match CFM to tool bursts, not nominal ratings
- Include storage to dampen pressure dips
- Minimize line losses for consistent PSI
H2 #6 Practical Toolkit: When to Prioritize CFM Over PSI (And Vice Versa)
We’ll map when to favor CFM or PSI by weighing the actual tools and tasks you run, not just numbers. In practice, CFM wins for sustained, high-demand airflow like continuous tool usage, while PSI matters for peak operation and fine-tuned performance under load. We’ll share clear tradeoff guides and concrete scenarios so you can prioritize CFM or PSI with confidence.
CFM Priority Scenarios
CFM and PSI each serve different practical needs, and knowing when to chase higher CFM versus higher PSI helps you keep a tool running efficiently. In CFM Priority Scenarios, we focus on sustained flow for high-demand tools, where volume matters more than peak pressure. We trade some pressure headroom for continuous delivery, especially when working with multiple fasteners,Die grinders, or air scalpels. For setups linked to alternative energy sources or where noise reduction is a priority, maintaining steady CFM becomes even more critical. We evaluate tool duty cycles, hose length, and fittings to prevent pressure drops that stall operations.
- Prioritize consistent airflow for continuous-use tools over max pressure
- Consider hose routing, fittings, and leaks to protect CFM integrity
- Balance energy source choices with CFM stability for quieter operation
PSI Tradeoff Guides
To decide when to favor PSI over CFM—and vice versa—we map tool demands to pressure headroom and sustained airflow. Our practical guide starts with a clear read of your task workflow, then aligns compressor characteristics to the job. We weigh PSI as the pressure cushion that keeps tools responsive during peak cycles, while CFM tracks how much usable air sustains operation over time. When tool duty requires bursts or dense environments, we prioritize PSI headroom; for steady, continuous runs, CFM becomes decisive. Two word discussion ideas emerge: efficiency balance. Irrelevant topic should stay out of the decision, keeping focus sharp. We present a concise framework: quantify duty, gauge tank pressure vs. tool requirements, then choose the tradeoff that preserves consistency, minimizes cycling, and reduces energy waste.
H2 #7 Common CFM/PSI Mismatches and How to Fix Them
Have you ever chosen an air compressor based on one spec and found it just doesn’t deliver in real use? We’ve seen mismatches bite people when CFM and PSI don’t align with tool demand or line loss. We fix this by matching duty cycle, hose length, and fittings to actual workflow, not hype. Consider ceiling height and space constraints for intake cooling and heat buildup, and plan noise considerations so the unit won’t overwhelm the shop.
- Verify actual CFM at the operating PSI your tools require
- Account for line losses from hose length and fittings
- Pair compressor duty cycle with tool bursts and ambient conditions
H2 #8 Budgeting Tips: Cost Vs Performance for CFM-PSI
How do you balance cost and performance when sizing for CFM and PSI? We approach budgeting as a discipline, not a guess. We compare upfront equipment price, long-term energy use, and maintenance needs to maximize throughput per dollar. We favor modest overprovisioning that preserves reliability, while avoiding underpowered setups that stall work. Two word discussion ideas: budget optimization, maintenance scheduling.
| Factor | Recommendation |
|---|---|
| Purchase price | Seek value with durability and warranty. |
| Energy cost | Favor compressors rated for duty cycles near your peak. |
| Downtime impact | Quantify productivity losses and include them in ROI. |
| Maintenance | Schedule regular service to extend life and performance. |
| Lifecycle | Compute total cost of ownership over 5–7 years. |
H2 #9 Selecting a Model: Step-by-Step Framework for Your Tasks
Selecting a model isn’t guesswork; it’s a structured decision. We approach model selection by mapping tasks to capabilities, then validating constraints like air quality and noise levels to fit workspace demands. We measure duty cycles, inlet filtration, and ambient conditions to prevent overfitting our choice to peak tests alone. We’ll align CFM-PSI performance with tool requirements, ensuring reliability and maintainability over time.
Choosing a model means mapped tasks, validated constraints, and balanced CFM-PSI for reliable, long-term performance.
- Prioritize task-specific CFM and sufficient PSI without overspec’ing for unnecessary wear
- Evaluate air quality implications, filtration needs, and moisture handling for long-term lifecycle
- Assess noise levels and enclosure options to preserve workplace comfort and compliance
Frequently Asked Questions
How Do CFM and PSI Differ in Practice for Tools?
We differ in practice: higher CFM moves more air for faster tool operation, while higher PSI handles tougher, pressure-requiring tasks. Different CFM, PSI matter; tool hose and fittings cap performance, so we balance CFM with PSI for efficiency.
Can a Compressor Deliver High CFM at Low PSI?
Yes, we can: we balance high cfm with low psi for certain tools, but not universally. We prioritize steady air at high cfm while maintaining sufficient pressure, ensuring practical, precise performance under real-world loads for readers like you.
Do You Need Higher PSI for Pneumatic Nailers?
We don’t always need higher PSI for nailers; we prioritize CFM and tool requirements. Nailer PSI varies by model, but we debunk CFM myths with precision and practicality, guiding you toward steady performance rather than chasing PSI alone.
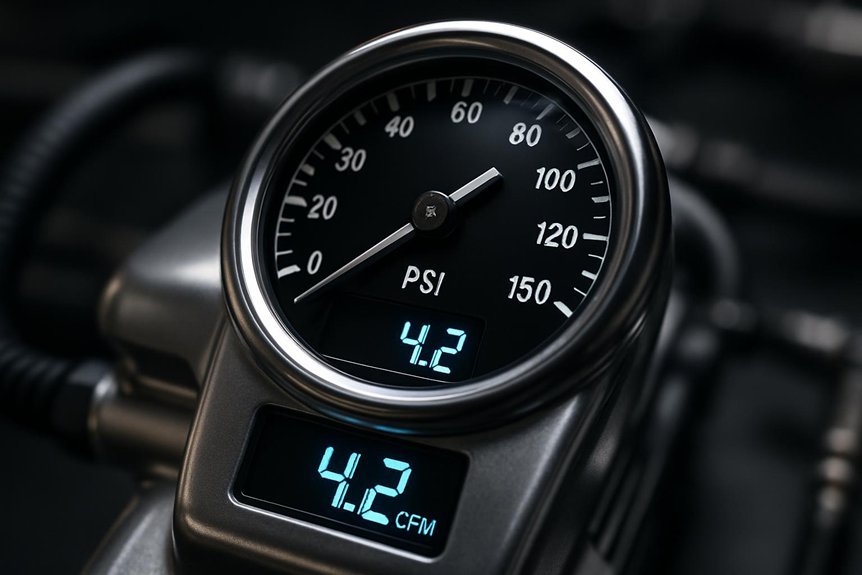
What Is the Minimum CFM for Sanding Machines?
Two-word discussion ideas, unrelated topic pairs: we recommend a minimum 4.0 CFM for most sanding machines, and higher for aggressive belt sanders; we’ll select a unit accordingly, ensuring precise airflow, practical performance, and reliable operation for you.
How Does Tool Hose Length Affect CFM and PSI?
Our answer: shorter hose lengths generally preserve CFM and pressure better, while longer hoses add friction losses; judge by tool compatibility, ensure fittings seal well, and test under load to confirm performance meets demands.
Conclusion
We’ll wrap this up like a well-tuned compressor: imagine our shop as a chamber, wires buzzing, tools sipping steady air. CFM is the breath that keeps everything moving, PSI the heart’s pulse that surges for a quick burst. When we read specs like map coordinates, we chart demand against supply, balance noise and capacity, and pick a model that fits our grind. With clarity and care, our air system stays reliable, efficient, and ready for the next task.

