Did you know that a poorly placed compressor can waste up to 30% of its output through heat, vibration, and pressure loss? We’re here to help you pick a solid, level spot that stays dry and true, with room to vent and service. Let’s outline practical placement basics, so you don’t double back later chasing issues. Now, consider how your layout affects airflow, maintenance access, and long-term reliability as you plan.
Key Takeaways
- Place on a solid, flat surface with stable mounting and anti-vibration measures to prevent movement during startup.
- Ensure 12 inches minimum clearance on all sides for airflow and maintenance access.
- Position away from walls, dust sources, heat, and moisture with proper ventilation and intake filtration.
- Route air lines and electrical circuits with minimal bends and dedicated outlets to minimize pressure loss and nuisance tripping.
- Document maintenance access, labeling, and safety compliance; plan for future expansion and quick shutoff accessibility.
How to Pick a Safe, Level Spot for Your Stationary Compressor
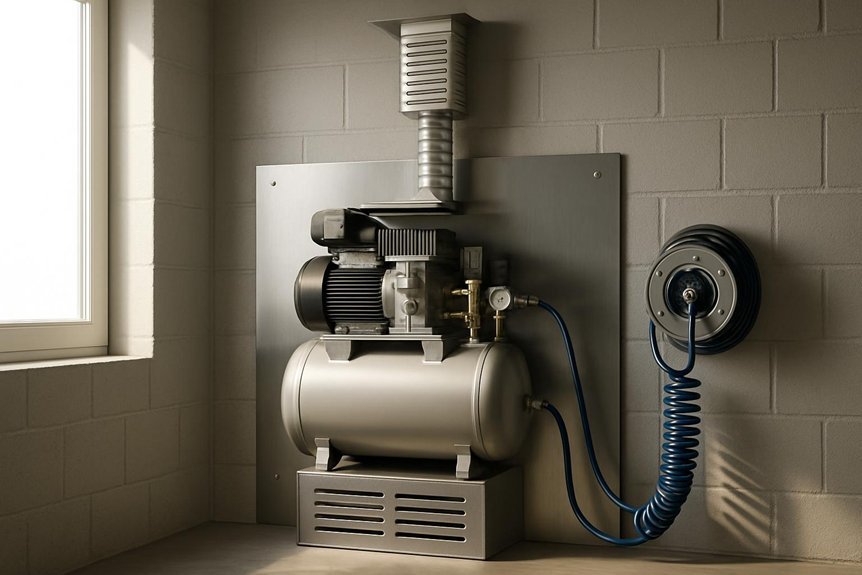
To choose a safe, level spot for your stationary compressor, start by guaranteeing the base is solid and flat, free of cracks or soft spots that could wobble or sink under vibration. We’ll assess load distribution, substrate quality, and correct shim placement to prevent movement during startup. Then we verify that the surface is dry and clean, with no debris that might damage feet or vents. Consider nearby service access, electrical outlets, and accessibility for routine maintenance. Compressor placement should minimize vibration transmission to surrounding structure, using anti-vibration pads if needed. Also factor Weather considerations: outdoor exposure, grate clearance, and protection from moisture or temperature swings. By prioritizing stability and protection, you ensure safer operation and easier service intervals.
How to Manage Ventilation and Heat for Longer Life
We’ll cover ventilation requirements and heat management techniques to extend your compressor’s life. We’ll outline practical airflow needs, placement considerations, and active cooling options to keep temperatures in check. If you follow clear guidelines now, you’ll reduce heat buildup and downtime later.
Ventilation Requirements
Ventilation is essential for longer compressor life: without adequate airflow, heat builds up, reducing efficiency and wearing components faster. We outline practical ventilation needs to ensure consistent performance and longevity. Proper airflow prevents hot spots, reduces crankcase temp, and facilitates steady cooling. Position the unit away from walls and obstructions, with at least 12 inches of clearance on all sides. Use dedicated vents aligned with intake and exhaust paths, and install a modest intake filter to minimize dust ingress. Monitor ambient temperature and adjust placement as needed to maintain optimal heat dissipation. Regularly inspect ductwork for blockages and seal leaks to preserve airflow. Table illustrates essential considerations for dependable heat management and sustained performance.
| Column A | Column B |
|---|---|
| Indoor deployment | Outdoor shading |
| Intake routing | Exhaust clearance |
| Airflow monitoring | Dust control |
Heat Management Techniques
Keeping heat under control is a practical extension of good ventilation. We address heat management as part of installation planning, not as an afterthought. We design for steady airflow and predictable cooling, using airflow optimization to move hot air away from components and return cooler air to the motor and compressor housing. Position intake and exhaust paths to minimize recirculation and heat buildup, and consider ambient temperature limits from the manufacturer. Where space is tight, use short, direct ducting and shielded vents to prevent hot pockets. Regular checks on coolant or lubricant temps help preempt degradation. Noise mitigation also matters, since quieter operation often means better air movement and less turbulence. Clear labeling and proactive maintenance keep performance consistent.
How to Install on a Stable, Level Surface
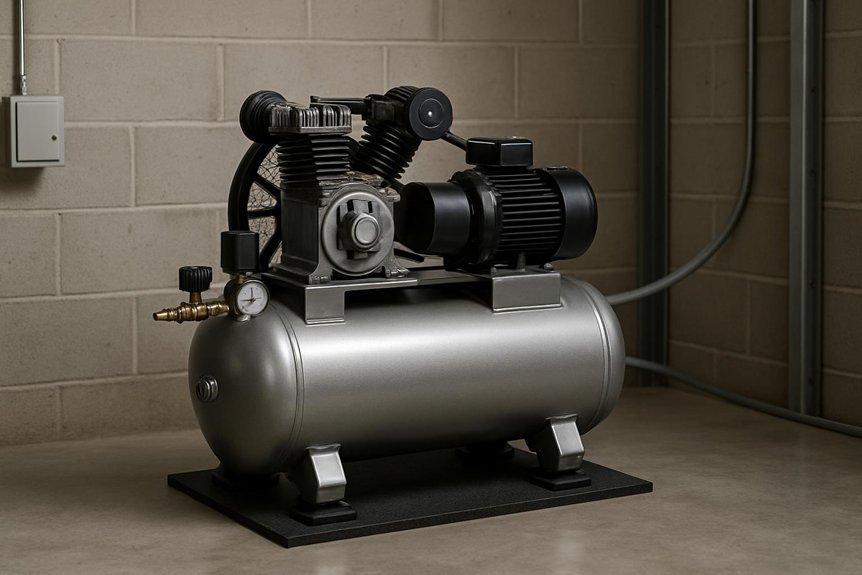
Installing on a stable, level surface is essential for safety and performance. We start by assessing your concrete floor, reinforced pad, or vibration-damping base to minimize movement and noise. We recommend securing the compressor to a dedicated, non-flexing mount to prevent migration under pressure surges. When leveling, use shims or adjustable feet to achieve true horizontality across the unit’s footprint, checking with a spirit level from multiple corners. Address stability considerations by choosing a surface that resists cracking, splitting, or shifting under vibration. If the existing floor isn’t perfectly flat, surface alternatives like modular anti-vibration pads or a purpose-built base can provide a stable platform. Avoid temporary supports and uneven mounting that could compromise performance or safety.
How to Position Near Tools to Minimize Pressure Loss
Where should you place the compressor relative to tools to minimize pressure loss? We position the stationary compressor close to primary tools and routes, but avoid crowding. Short, direct runs reduce pressure loss and improve response times. We consider hose diameter, routing, and local noise isolation to keep performance steady.
1) Route air lines in straight, low-resistance paths with minimal bends to reduce turbulence and pressure loss.
2) Keep the highest-demand tools closest to the compressor, and balance loads to avoid overtaxing any single line.
3) Use dedicated lines for large-volume tools and a trunk line for small outlets, then branch minimally at each station to preserve pressure.
This approach minimizes pressure loss, ensures reliable start-up, and supports quiet operation in a compact workspace.
How to Keep Dust, Moisture, and Fumes Away
How do we keep dust, moisture, and fumes away from a stationary compressor setup? We use sealed rooms or enclosures, bypass drafts, and implement filtration and drainage strategies. Our approach emphasizes dust filtration and humidity control to protect components and air quality. We install prefilters, sorbents, and clean intake paths, with positive pressure to prevent contaminant ingress. Regular drainage and condensate management remove moisture before it reaches the compressor core. We monitor humidity and replace filters on schedule, not guesses. Below is a quick reference to keep you focused.
| Intake protection | Filtration stages | Condensate management |
|---|---|---|
| Sealed intake | Dust filtration | Drain valves and traps |
| Positive pressure | Filter monitoring | Humidity control |
How to Reduce Noise and Plan Maintenance Access
We’ll minimize noise and simplify maintenance by planning access points and routing early in the setup. We focus on practical layout choices that enhance noise isolation while keeping costs reasonable. By locating the compressor away from high-traffic areas and near existing exhaust routes, we reduce vibration transfer and sound propagation without extra expense. Plan service bays and filter housings for quick access, and include malleable conduit paths to simplify future upgrades. Consider budget-friendly sound-attenuating ducting and vibration isolators as core elements of cost considerations.
- Identify access routes for routine service and emergency shutoffs.
- Position vibration dampers and isolation mounts near the compressor frame.
- Route hoses and wiring to minimize noise paths and facilitate maintenance.
How to Wire, Outlet, and Route Hoses Safely
We’ll cover wiring safe practices, outlet placement rules, and hose routing tips to keep your system reliable and safe. We’ll outline practical steps for secure wiring, appropriate outlet locations, and clean, protected hose paths. If you have questions, we’ll help you apply these basics to your setup.
Wiring Safe Practices
Installing a compressor safely starts with clean, organized wiring and properly routed hoses. We’ll cover practical wiring practices that minimize risk and downtime, while referencing two word discussion ideas: electrical grounding, wire gauge.
- Determine load and wire gauge before any install, matching circuit capacity to motor start current and runtime.
- Use dedicated, grounded circuits with proper protection and clear labeling; keep hoses and cables off sharp edges and away from heat sources.
- Plan routing to minimize interference, secure cables with clamps, and maintain strain relief at panels and outlets for reliability.
Together, these steps reduce nuisance trips and electrical hazards, ensuring safe, consistent operation. Always verify grounding continuity and insulation integrity after any modification.
Outlet Placement Rules
In wiring a compressor setup, outlet placement follows the same discipline as wiring safety: plan around motor start currents, heat sources, and available service. We map outlets to minimize voltage drop, prevent nuisance tripping, and keep hoses accessible without crossing moving parts. Place dedicated outlets near the compressor and near major tool zones, with separate circuits if possible. Use proper electrical grounding and avoid shared neutrals that could raise noise levels. Maintain clear spacing from heat sources and keep noise guidelines in mind when routing cords and hoses. For labeling, clearly indicate circuit numbers and outlet purpose.
| Outlet | Location rationale | Safety note |
|---|---|---|
| A | Near equipment bay | Grounded, dedicated |
| B | Adjacent to workbench | Distinct circuit, labeled |
| C | By maintenance door | Easy shutoff, unobstructed |
Hose Routing Tips
Hose routing is as critical as outlet placement for safe, efficient operation. We’ll cover practical routing and vibration isolation to minimize issues.
- Plan a straight path with gradual bends to reduce kinks and pressure drops, and keep hoses off busy walkways.
- Use vibration isolation mounts or anti-fatigue pads where hoses connect to the compressor or tools to suppress movement and noise.
- Secure hoses with clips or straps, avoiding over-tightening, and route away from heat, oil, and sharp edges to extend hose life.
We emphasize hose routing discipline: label ends, maintain slack for tool movement, and inspect routinely for wear. By combining careful hose routing with vibration isolation, we reduce leaks, fatigue, and downtime, keeping the system reliable.
How to Meet Safety Codes and Plan for the Long Term
Before we install or relocate a stationary air compressor, we must understand the safety codes that govern our workspace and plan for long‑term reliability. We approach compliance with clear, practical steps: verify local codes, NFPA standards, and manufacturer requirements before any install. Identify safe placement that minimizes ignition risk, reduces vibration transfer, and provides clear access for maintenance. Ensure electrical safety by sizing feeders, installing proper overcurrent protection, and using weatherproof, properly grounded outlets in dry, ventilated areas. Plan for future expansion by reserving space, routing hoses and wiring away from high‑traffic zones, and labeling shutoffs. Document inspection intervals, routine maintenance, and replacement parts to sustain reliability and air quality. Adhere to ongoing safety reviews to prevent code drift and hazards.
Frequently Asked Questions
Can I Install a Stationary Compressor Outdoors in Winter Climates?
We can’t reliably run a stationary compressor outdoors in winter; we’d risk icing and performance loss. For winter operation, ensure outdoor ventilation is adequate and consider a heated enclosure, dewpoint control, and frost protection to protect components.
What Is the Ideal Distance From Flammable Materials to the Unit?
We should maintain at least a 3-foot clearance from combustibles; ensure safe flammable material proximity by keeping the area clear and ventilated. We monitor clearance from combustibles and position the unit away from any flame sources.
How Often Should I Check for Gas Leaks or Air Leaks?
We conduct routine gas leak inspections daily, and we check for air leaks weekly, because safety and reliability matter. We prioritize pressure relief safety, then document findings, communicating fixes to you with clear, practical, concise steps.
Do I Need a Dedicated Electrical Circuit or Shared Circuit Limits?
Yes, we should use a dedicated electrical circuit for a stationary air compressor to handle startup surges; avoid shared circuits. Our recommendation covers electrical circuits and outdoors installation considerations, with proper weatherproofing, GFCI where required, and safe outdoor installation.
Should I Install a Condensate Drain and Where Is Best?
We should install a condensate drain near the compressor, at a low point on the drain line, for reliable condensate drainage and easy maintenance, and the install location should accommodate accessible service and proper venting.
Conclusion
We are the steady backbone of your shop, like a quiet lighthouse on a calm pier. We stand on solid ground, level and true, guarding against wobble and drift as stormy air presses in. We guide hoses straight, vents clear, and power paths direct, so every tool breathes at full strength. Keep clutter away, noise down, and maintenance close at hand. When we align and endure, your compressed air family lasts and serves, steady as the harbor’s heart.

